It’s been 25°C in London this week, so naturally I thought I’d make a nice bowl of refreshing chilli – good one.
I’ve got a bit of a love hate relationship with chilli as it’s often the rubbish vegetarian option I get offered in pubs. Time and time again, it’s a sad, watery can of tinned tomatoes with a few beans floating in it – often reminds me of what you see splattered on pavements outside bars and kebab shops after a night out – mmm, appetising.
However, my version is robust, bold and sexy. So forget nights out, let’s have a night in and curl up with a bowl of the good stuff.
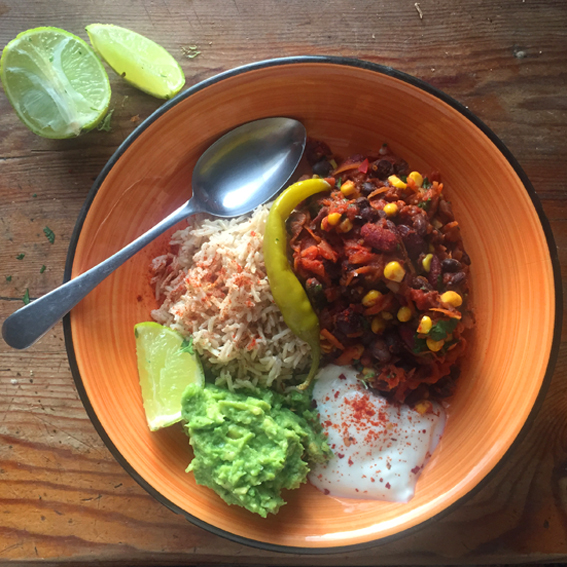
Smoky mixed bean chilli
Serves 4 / Hands on time 20 mins / Total time 45 mins V Vn Df Gf ❄🌶
1 tsp rapeseed oil
½ red onion, chopped
1 medium carrot, grated
1 tbs tomato purée
1 large or 2 tomatoes, roughly chopped
2 cloves of garlic, crushed
1 can chopped tomatoes
1 can of black beans, rinsed and drained
1 can of kidney beans, rinsed and drained
2 tsp smoked paprika
½ tsp chilli flakes (leave out if you like your chilli mild)
1 tsp Marmite
½ vegetable stock pot, I use Knorr
1 corn on the cob, kernels removed or 1 small can drained
28g fresh coriander, chopped
1 lime, cut into wedges
Method
1. Fry the onion in the oil over a medium heat until softened (add a dash of water to help the onion steam and cook faster). Meanwhile, peel and grate the carrot and put to one side. Once the onion has softened, add the garlic, smoked paprika, tomato puree and the chilli flakes and give it a good stir. Add a dash more water and cook for a couple more minutes.
2. Drain and rinse the beans, before adding them to the pot along with the tinned tomatoes, fresh tomatoes and grated carrot.
3. Add the stock pot along with the Marmite and give it a good stir before seasoning and bringing to the boil.
4. If using fresh corn, remove the kernels by standing the sweetcorn on its head and running a sharp knife carefully down the sides slowly (the kernels can tend to go everywhere, so proceed with care). Add to the chilli.
5. Turn the heat down and simmer for 20 mins (now is a good time to roughly chop the coriander). Remove from the heat, stir in the coriander and squeeze over the juice of a lime. Serve either on the top of a baked sweet potato, with rice, guacamole and good dollop of sour cream.


If you’ve had a go at making any of my recipes, I’d love to hear from you. Follow me now @corrieheale and tag your recipe pictures using #corriesrabbitfood.


V– Vegetarian Vn – Vegan. Df – Dairy free 🌶– Spicy
Gf – I use Knorr vegetable stock pots because they are gluten free but other stock pots/cubes may not be. Always check the label.
❄ – Suitable for home freezing. Consume within 3 months.
LOW FOD MAP Adaptation:
1. Replace red onion for 1 tbs garlic oil and handful of chopped spring onion tops
2. Swap all beans and corn for 1 can of lentils in water and 1 can of chickpeas (drained and rinsed well)
3. Leave out fresh tomatoes
4. Add 150ml water (if a little dry)