

A strange recipe to start off my blog I know, but I was dangerously bored last Sunday and found a cheese making kit under a pile of books in my room. Ever so slightly out of date I decided to give it a whirl, cheese is better out of date anyway right? To my surprise the box only contained four things; half a metre of muslin cloth, a thermometer, a bag of rock salt and a bag of citric acid which you can substitute for lemon juice (hope my friend Jenni didn’t spend too much money on this present).
So anyway, off I went and bought 2 litres of goats milk and I was ready to give it a go, expecting it to be a complicated time consuming process. Two hours later I was eating goats cheese on toast, it was that easy! This is how I did it…
Homemade Goats Cheese
Makes 1 ball / Takes roughly 2 hours / V
You’ll need… Thermometer, Large deep pan, Colander, Butter muslin cloth (about 1/2 a metre)
1 tsp salt
1 tsp lemon juice
2 litres of whole goats milk
A fresh loaf of bread, I recommend walnut or sourdough
50ml of cooled boiled water (I just used the water in my kettle)
(Plus any herbs, garlic or chilli you may wish to add to flavour the cheese but you don’t have to. I just used a bit of freshly chopped parsley)
1. Mix 1tsp of citric acid (or lemon juice) into 50ml of cooled boiled water until dissolved and set aside.
2. Pour your milk into the pan and add the citric acid solution. Stir in an up and down motion thoroughly. Stir continuously but gently heat the milk on a medium heat up to 180F. You will see the milk begin to separate into the curds and whey (so that’s what curds and whey are, huh.) It will appear a little grainy.
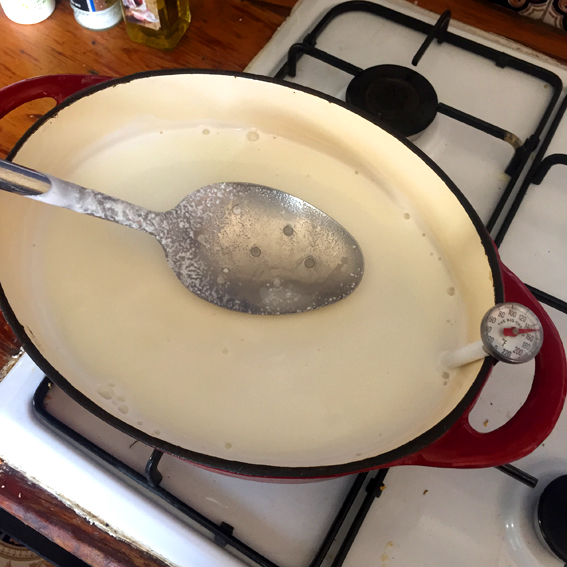
3. Remove from the heat, cover with a lid and leave for half an hour. Have a cup of tea.
4. Put your colander in the sink and line with doubled over muslin. When the milk has cooled, gently pour into the colander and let the whey drain away. Once most of it has drained, mix in the salt and the herbs (if using).
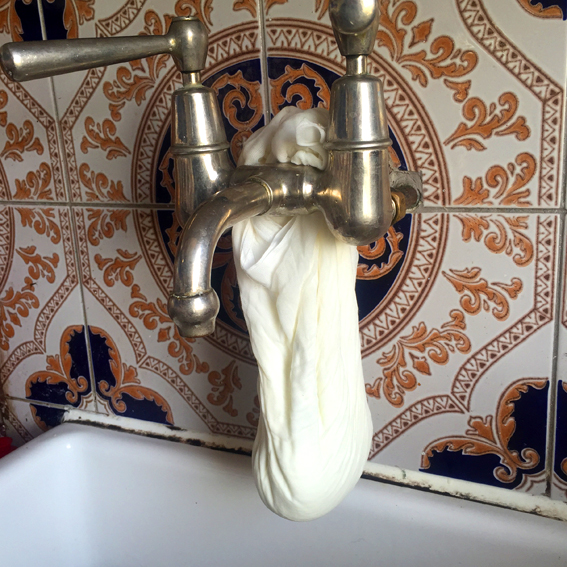
5. Gather up the edges of the muslin to create a bag, twist the bag and give it a gentle squeeze to further extract the whey. Don’t squeeze too hard though, you don’t want the cheese to start seeping out (I apologise for using the word ‘seeping’). Use the corners of the muslin to securely tie it over a tap and leave for another half hour to an hour.
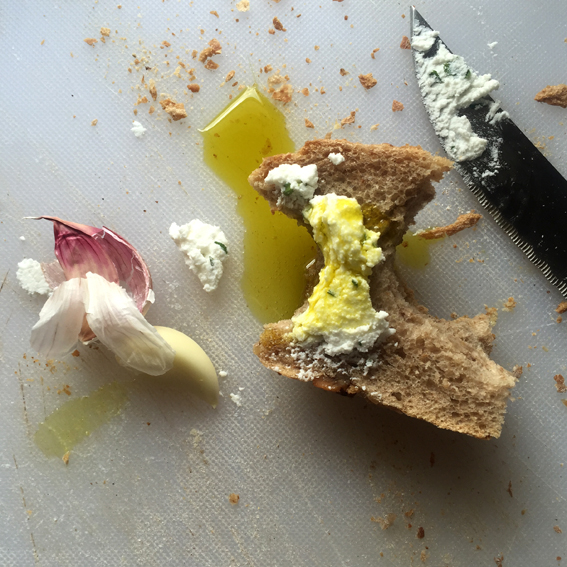
So that’s kind of it, YOU’VE ONLY GONE AND MADE FRICKIN CHEESE! Shape your cheese into whatever shape you desire, I like a log shape myself. You can eat the cheese immediately so get that lovely bread in the toaster, rub it with a garlic clove and spread the cheese liberally on top. Sprinkle with a good pinch of salt and drizzle with extra virgin olive oil or avocado oil. Refrigerate your cheese and it should keep for up to a week.


If you’ve had a go at making my goats cheese or any of my other recipes I’d love to hear about it. @corrieheale corrie.heale@gmail.com


The goat’s curd looks delicious! It’s roughly the same method that I’ve used in the past to make fresh ricotta – easy if you know how. I’m keen to try goat’s curd next time.
LikeLiked by 1 person
Love that this was the first post in your blog, and the cheese turned out so well! 🙂
LikeLiked by 1 person