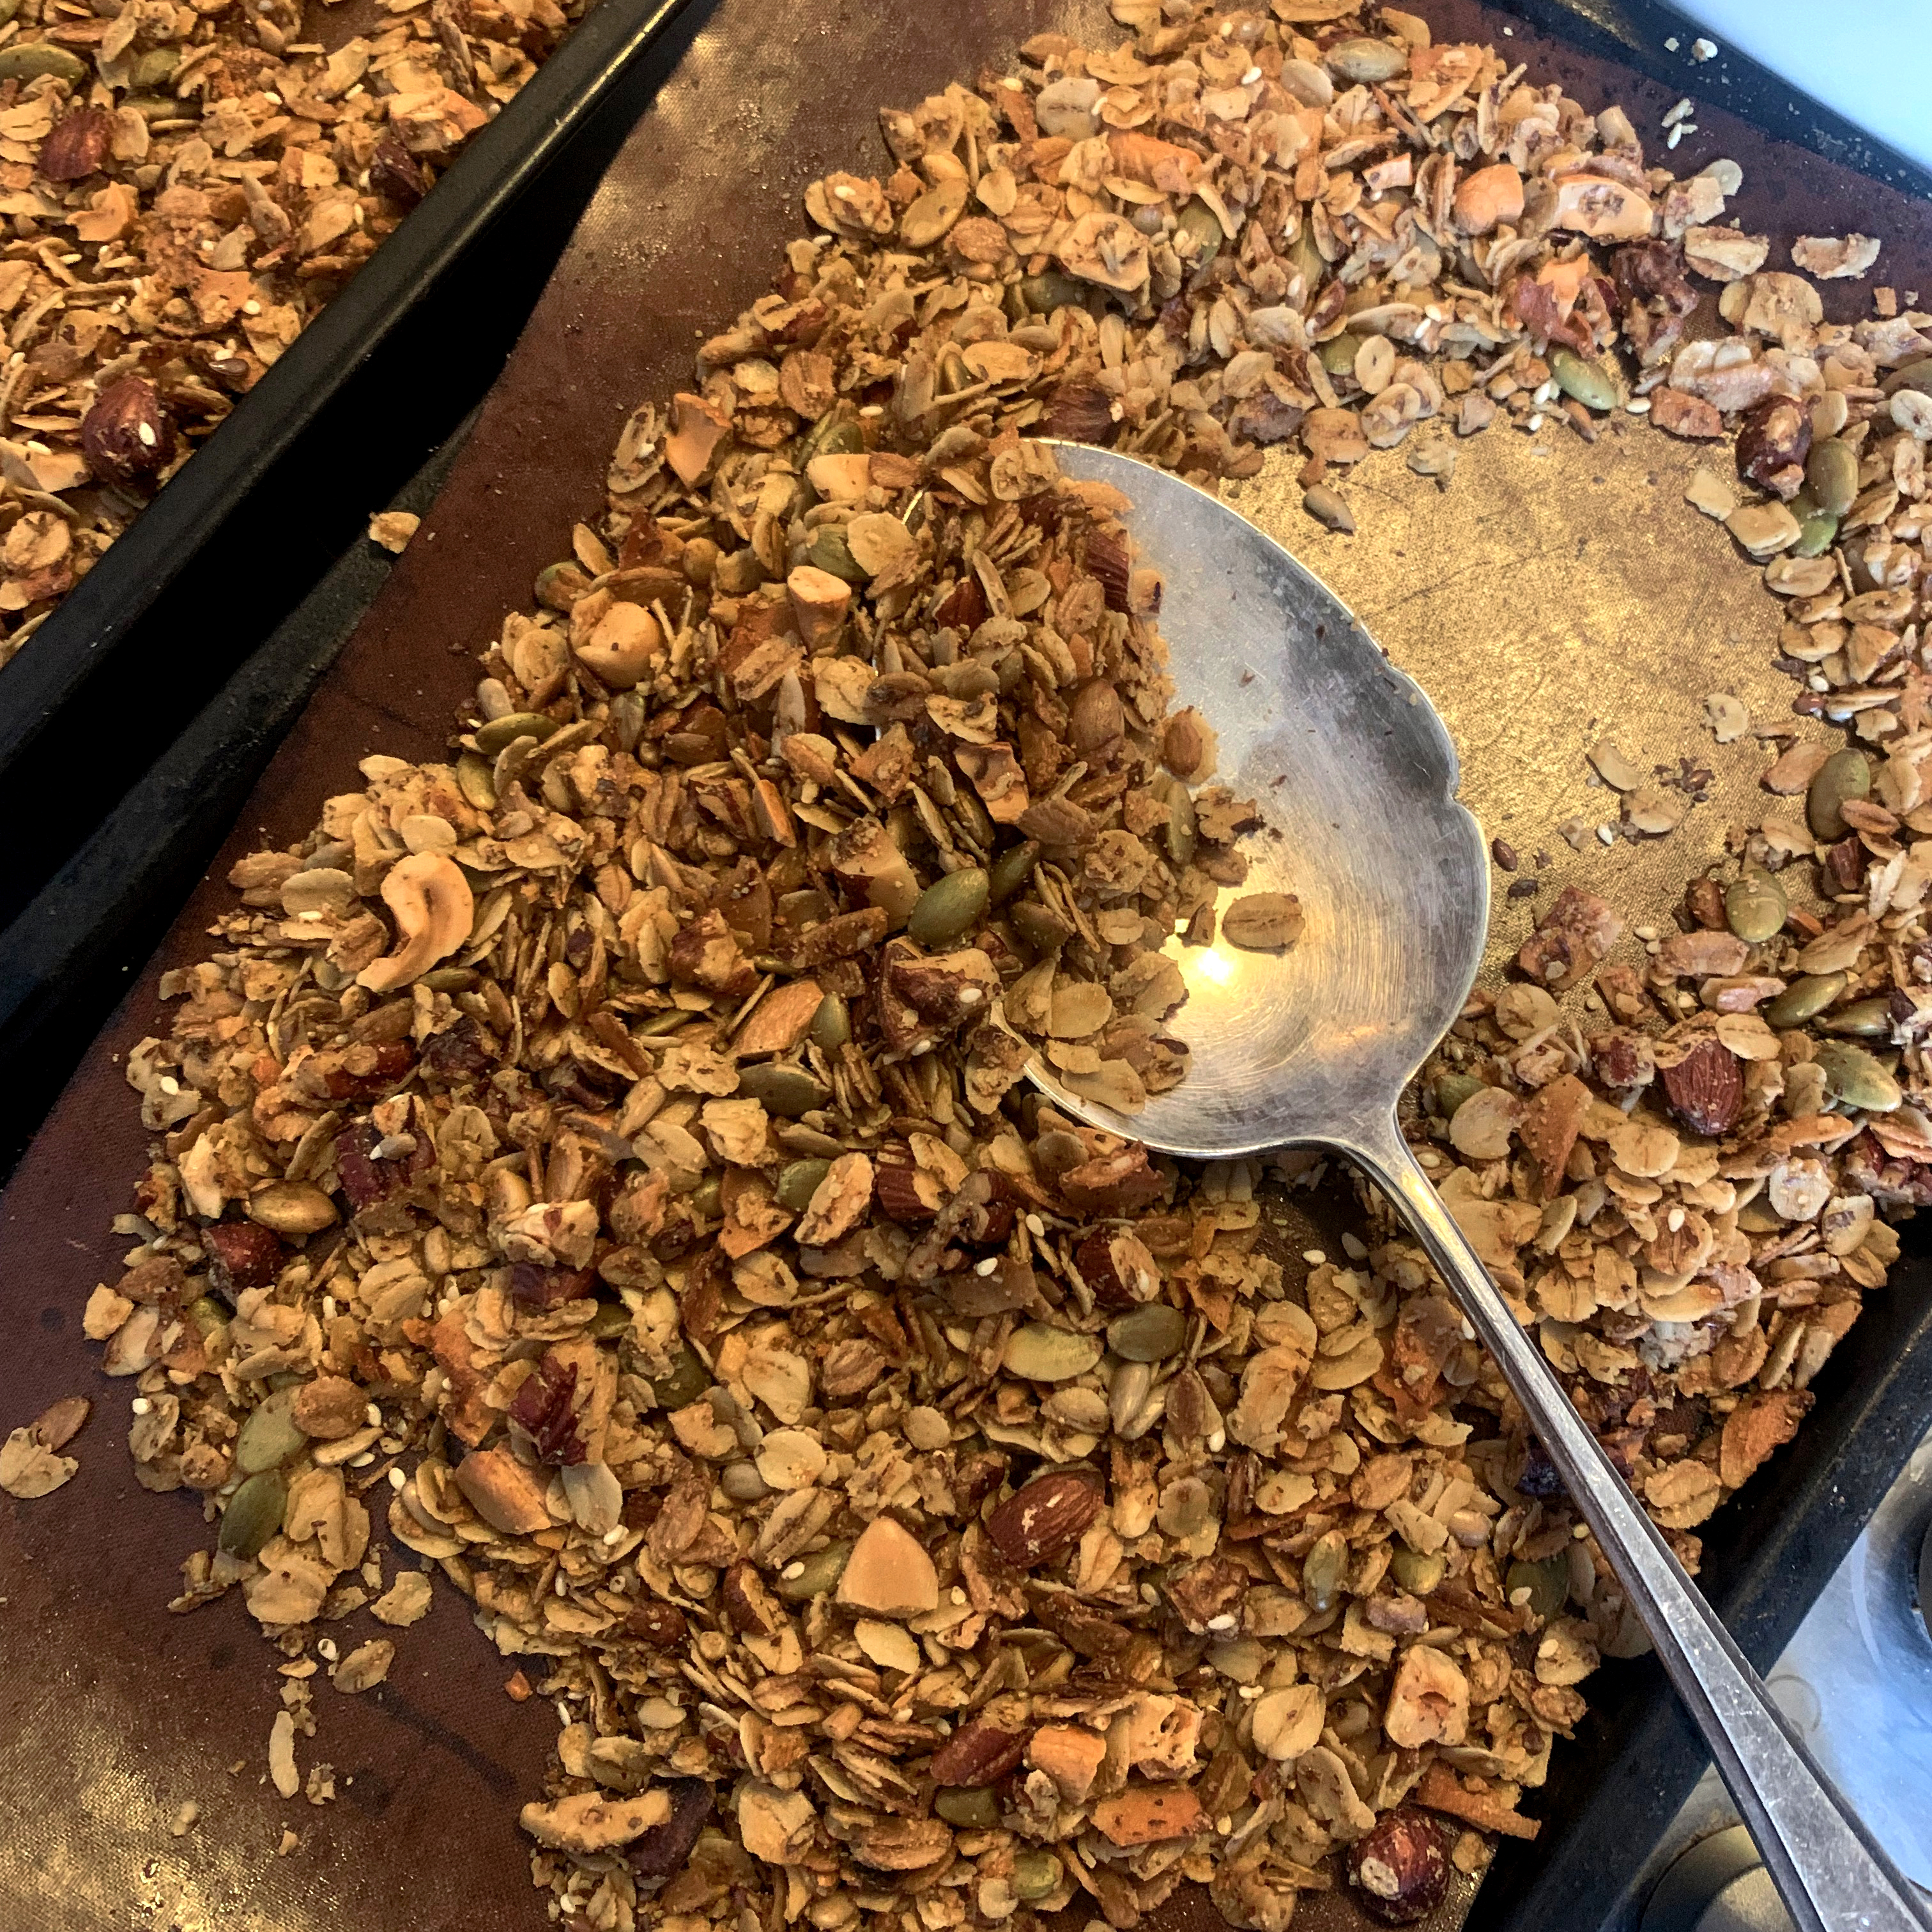
Using extra virgin olive oil to make granola might seem like I’ve lost my tiny little mind but don’t knock it until you’ve tried it. This is my friend Bianca’s recipe and she is a professional food stylist, so if you don’t trust me, trust her!
Nutty olive oil granola
Make 1 litre jar / Hands on time 20 min / Total time 55 mins + cooling time / V Vn DfGf Dry ingredients:
100g jumbo rolled oats or gluten free oats 33g spelt flakes 75g mixed nuts, finely chopped 25g mixed seeds 25g pumpkin seeds 15g coconut flakes, finely chopped 15g milled flaxseed Pinch of fine salt Wet ingredients: 35g maple syrup 50ml extra virgin olive oil
Nutty olive oil granola
1. Preheat an oven to 160°C/140°C fan/325°F/gas mark 3 and line two baking trays with parchment paper.
2. Start by roughly chopping the nuts along with the coconut flakes (I tend to chop mine quite finely so that I get larger variety of nuts in every mouthful but if you prefer a chunkier texture, then chop them less).
3. Add all the dry to a large bowl and give it a good stir until well combined.
4. Mix together the maple syrup and extra virgin olive oil in a small bowl before adding and mixing well, making sure the mixture is well coated.
5. Divide the granola evenly between the 2 trays and spread out as evenly as possible.
6. Bake in the over for 30 mins making sure to turn the granola gently every 5 mins with a spatula. Bake until the granola is nicely golden and toasted (granola burns easily make sure you keep a close eye on it while it’s cooking).
7. Leave to cool fully on the trays before adding any chopped dried fruit and scooping into an airtight container or jar. Serve with yogurt and fresh fruit.
Nutty olive oil granola
If you’ve had a go at making any of my recipes, I’d love to hear from you. Follow me now @corrieheale and tag your recipe pictures using #corriesrabbitfood.
With the cost of living rising and energy levels soaring to unprecedented levels, we’ll all be tightening our belts for the next hundred years – so probably not the best time to buy a flat. Oh well, we’ve done it now, so we might as well snuggle up with a bowl of jammy baked oats and think warm thoughts, as it’s going to be a long cold winter… Wow, that came out bleaker than anticipated… Here’s a funny cat video to make up for it.
Blueberry baked oats Serves 1 large or 2 smaller portions / Hands on time 5 mins / Total time 25 mins VGf* You’ll need: Oven-proof ramekins
40g gluten free or regular porridge oats
100g full-fat or fat-free Greek yogurt
1 medium egg
1 tsp maple syrup
½ tsp vanilla extract
75g blueberries (or fruit of your choosing)
Flavourless oil for ramekins (I use Fry Light spray oil)
TIP: This recipe makes one hearty portion of porridge or two slightly more modest portions. I tend to split it into two on a weekday as I prefer to eat lighter midweek. TIP: Not keen on blueberries, try substituting for other fruits such as plum, raspberries or even apples.
Method
Preheat an oven to 180°C/160°C fan/ 350°F/gas mark 4. In a medium sized bowl, measure and combine all the ingredients together and put to one side.
Lightly oil one to two ramekins and spoon in the mixture. Bake on the middle shelf for 20 minutes (it should be springy to the touch when cooked). Allow to cool for a few minutes and serve in the ramekins with extra yogurt and maple syrup if you like.
TIP: Baked oats can be chilled and kept in the fridge for up to 4 days. I like to take them to work in a Tupperware cold and reheat in the microwave.
Blueberry baked oats
V – Vegetarian *Gf – If gluten free, please use gluten free porridge oats
Salads! The go to lunch choice for many of us, but there’s a point when you no longer look forward to the same old tuna salad with balsamic dressing. So, jazz up your salads this summer by adding variety, texture and a bit of creativity to your salad bowl.
Homemade Salad Boxes
HOW TO BUILD YOUR SALAD
Two handfuls of leaves: If buying a bag of salad leaves, I would stick to either rocket, watercress or spinach – they last longer than mixed bag varieties. I tend to buy baby gem or just regular lettuce and chop it up as I need it. It’s cheaper and lasts a lot longer – sometimes up to two weeks!
One handful of vegetables or salad: Here are a few ideas I like that are quick and easy to make yourself. Cold baked sweet potato/butternut squash chunks, minted new potatoes, roasted carrots with dill and lemon (see recipe below) mixed roasted vegetables, tomato and onion salad (see recipe below), roasted peppers.
Feeling lazy? Shop bought deli artichokes or even jarred roasted pepper are delicious and a great substitute.
Pick your protein: Personally, I like cheese. 50g of either feta, mozzarella, goats cheese or halloumi. For a more substantial lunch, I also like to include either a boiled egg (hard boiled eggs can last up to a week in the fridge), half an avocado or half a can of drained chickpeas, canned lentils or edamame beans. If you eat meat, then this is your chance to add a bit of cooked chicken or fish.
Make it heartier: Cook up 100g of couscous, bulgur wheat, quinoa or even whole-wheat pasta (see recipe below) and add this to your salad to make more of a meal of it. This will keep for up to 3 days in the fridge. You can also buy packets of precooked mixed grains – Merchant Gourmet have some great varieties.
Add a bit of crunch: Adding a sprinkling of seeds, nuts, croutons or even breadcrumbs, add a lovely bit of texture and bite to your salad. Sunflower, pumpkin seeds and toasted pine nuts are my personal favourites.
Dress is up: 1 tablespoon of either homemade dressing (see recipe below) shop bought dressing, hummus, zatziki, a good drizzle of chilli sauce or even just extra virgin olive oil – no one likes a dry salad.
Extra acidity:
I always think a salad is greatly improved by a bit of acidity, tang and heat. I always include a few olives, a sprinkle of chilli flakes and some sort of pickle such as pickled onions, gherkins, pickled chillies or jalapeños.
So, there you have it. The building blocks to make your summer salads sing. With a little bit of preparation this formula gives you the tools to change up your lunchtime salads into creative works of art! Below are a few additional simple recipes ideas to get those creative juices flowing…
Roasted carrots with dill and lemon: Preheat an oven to 220°C (200°C fan). Peel and chop two large carrots and pop them on a baking tray. Sprinkle with salt and pepper and spray with spray oil. Pop them in the oven for 10 mins before giving them a quick turn with a spatula. Continue to cook for a further 10 mins. Meanwhile chop a small handful of dill and make the dressing by combining 1 tsp lemon juice, 1 tsp of extra virgin olive oil and a sprinkle of salt and pepper. Once the carrots are roasted, leave to cool fully. Tip the cooled carrots into a bowl and stir in the dressing and the chopped dill. Put in an airtight container and store in the fridge for up to three days.
Five been salad: I literally buy a can Napolina Five Beans, strain them and give them a quick rinse (not too much or you’ll lose the flavour as they are slightly spiced). I then add a finely chopped stick of celery and that’s it! Pop in an air tight container and use within 3 days.
Cucumber, feta and olive salad:
Peel and chop half a cucumber and put in a bowl with a sprinkle of salt. Roughly chop a large handful of black pitted olives and add this to the cucumber. Crumble over 100g feta cheese and give it a good mix. Finish with a drizzle of extra virgin olive oil and keep in an airtight container in the fridge for up to 3 days.
Tomato and onion salad:
Slice 2 tomatoes along with a few very thin slices of red onion. Season well with salt and black pepper and finish with a drizzle of extra virgin olive oil. Keep in an airtight container for up to 3 days in the fridge.
Whole baked sweet potato:
Preheat an oven to 220°C/180°C fan. Carefully score the sweet potato with a sharp knife along the skin and insert into the centre. Withdraw the knife and place in the oven onto of a piece of foil on the middle shelf for 40-50 mins –depending on the size of the potato. Leave to cool fully before wrapping in foil and keep in the fridge for up to 3 days.
Pesto pasta salad:
Cook 50g whole wheat pasta according to instructions. Once cooked, drain and cool with a stream of cold water before returning back to the saucepan. Cover with cold water and leave to cool fully. Drain well. Stir through a tablespoon of your favourite pesto (I like Sacla’s Chargrilled Aubergine). Transfer to an air tight container and refrigerate for up to 3 days.
Dressing:
I like to keep it simple when it comes to salad dressing, so I tend to stick to honey and mustard – I find it goes with almost anything. If making a salad for one, this is the perfect amount of dressing. Mix together 1 tsp of extra virgin olive oil, 1 tsp of cider vinegar in a small ramekin. Add a quarter teaspoon of Dijon mustard and a drizzle of honey. Season with salt and pepper and stir again until combined. For a more indulgent creamy dressing, try stirring in 1 tbs of hummus, it’s delicious.
If you’ve had a go at making any of my recipes, I’d love to hear from you. Follow me now @corrieheale and tag your recipe pictures using #corriesrabbitfood.
This May has been particularly wet, blustery and cold. So let’s save the summer salads for better weather and cook up a big hearty batch of my creamy tomato and coconut dhal with cavolo nero. This vegan one-pot wonder can be easily doubled and teamed with rice, naan and chutney for the perfect Friday night fake-away. Summer will just have to wait.
Coconut and tomato dhal
Tomato and coconut dhal with cavolo nero Serves 2 or 4 with rice / Hands on time 15 min / Total time 40 mins /V VnGfDf❄
1 tbs garlic oil
2 tsp ground cumin
1 tsp ground coriander
2 tsp ground turmeric
1 tsp garam masala
½ tsp salt
¼ tsp chilli flakes
1 tbs tomato purée
1 can chopped tomatoes
1 can full-fat coconut milk
1 can green lentils (rinsed and drained)
½ tsp gluten free bouillon or half stock cube
2 large handfuls chopped cavolo nero or kale To serve:
Brown basmati rice (50g per person)
Handful of fresh coriander, roughly chopped
Brown toasted pita bread (optional)
Mango chutney (optional)
TIP: Don’t have garlic oil? Simply use whatever cooking oil you have and add 2 peeled and chopped garlic cloves. Allow to infuse in the oil over a medium heat for a couple of minutes before adding the spices.
TIP: This recipe is easily doubled so stock up your freezer with this healthy batch cook.
Method 1. In a large pot of saucepan, heat the garlic oil over a medium heat until warmed through. Add the cumin, coriander, turmeric, garam masala, chilli flakes and the salt until you heat them fizzing. Cook for 2 minutes before adding the tomato purée along with a dash of water (this helps loosen the paste) and cook for a further 2 mins.
2. Rinse and drain the green lentils and add to the pan along with the tin of coconut milk and tinned chopped tomatoes. Sprinkle over the bouillon or the stock cube and stir well until fully incorporated. Bring to the boil.
3. Simmer uncovered for 20 mins stirring occasionally. If serving with rice, now is a good time to get it on.
4. After 20 mins the dhal should be thick and glossy. Take off the heat and stir in the cavolo nero and cover with a lid for 4-5 mins.
5. Serve topped with chopped fresh coriander with either rice, toasted pita bread or naan and a goof dollop of mango chutney.
Coconut and tomato dhal
If you’ve had a go at making any of my recipes, I’d love to hear from you. Follow me now @corrieheale and tag your recipe pictures using #corriesrabbitfood.
V – Vegetarian Vn – Vegan Gf – Gluten free Df – Dairy free
To freeze, omit the cavolo nero and cool fully before freezing. Consume within 3 months
As lockdown eases you’ll find that the dining room is no longer in the house, it’s in the garden. So, dust off the patio furniture and string up the fairy lights because alfresco dinner parties are set to be this Summer’s biggest trend. Dinner parties can be a daunting prospect, so why not keep it simple and serve up a big vat of crowd pleasing Bolognese? Not only does my red lentil Bolognese make a tasty vegan summer recipe, it’s simple, delicious and could feed an army! Serve with homemade garlic bread, torn fresh basil and lashings of extra virgin olive oil, for the perfect vegan dinner party idea this summer.
Vegan red lentil bolognese
Vegan red lentil Bolognese
Serves 6 / Hands on time 30 mins / Total time 1 hr 10 mins /V VnDf❄
1 tsp rapeseed oil
1 large white onion, peeled and diced
2 carrots, peeled and diced
2 celery sticks, diced
2 garlic cloves, peeled and diced
1 can plum tomatoes
250g red lentils
1 tbs tomato purée
¼ tsp ground nutmeg
2 tsp dried oregano
2 tsp dried parsley
700ml vegetable stock, I use 1 Knorr stock pots
3 tbs vegan red wine (optional)
8 cherry tomatoes, sliced in half
450g whole-wheat spaghetti or gluten free alternative (75g per person) Extra virgin olive oil to serve
Fresh basil leaves to serve (optional)
TIP: This Bolognese is suitable for home freezing once cooked. To freeze, cool fully before spooning into bags or Tupperware. Freeze for up to 3 months.
Method
1. In a large cooking pot, sweat the diced onion, carrots, celery and garlic together in a tsp of oil over a low heat. Season well with salt, put the lid on, and sweat for 15 mins, stirring occasionally.
2. Add the tomato purée and the tinned tomatoes. Break the tomatoes up a bit with a spoon before pouring over the stock, wine, lentils, cherry tomatoes and sprinkle over the oregano, parsley and the nutmeg. Season well with salt and pepper and bring to the boil.
3. Once boiling, turn the heat down and simmer for 25 mins with the lid on, stirring occasionally to dislodge any lentils stuck at the bottom.
4. After 25 mins, keep the Bolognese cooking and fill a large saucepan with boiling water and add the whole-wheat spaghetti. Season the water well with salt and boil the pasta for 10-12 minutes (or according to the packet instructions).
5. Once the pasta is cooked, take off the heat along with the Bolognese. Drain the pasta and divide into bowls. Top the spaghetti with the Bolognese and serve drizzled with olive oil and topped with a good crack of black pepper and fresh basil leaves.
Vegan garlic bread
2 baguettes or ciabatta loaves (not too big they won’t fit in your oven)
150g dairy-free margarine
4 garlic cloves, crushed
1tbs dried oregano
Method
Preheat an oven to 200°C/180°C fan/400F/gas mark 6. Cut both loaves into slices about 2cm thick, being careful not to slice right through to the bottom, leaving the base intact. In a bowl, mix together the dairy-free margarine, garlic and oregano. Place each loaf on a large sheet of foil and spread the garlic margarine between the slices of bread. Sprinkle with salt and pepper before wrapping in the foil and placing on a baking tray. Bake for 5 mins before unwrapping and cooking for a further 4-5 mins until crisp. Serve immediately.
If you’ve had a go at making any of my recipes, I’d love to hear from you. Follow me now @corrieheale and tag your recipe pictures using #corriesrabbitfood.
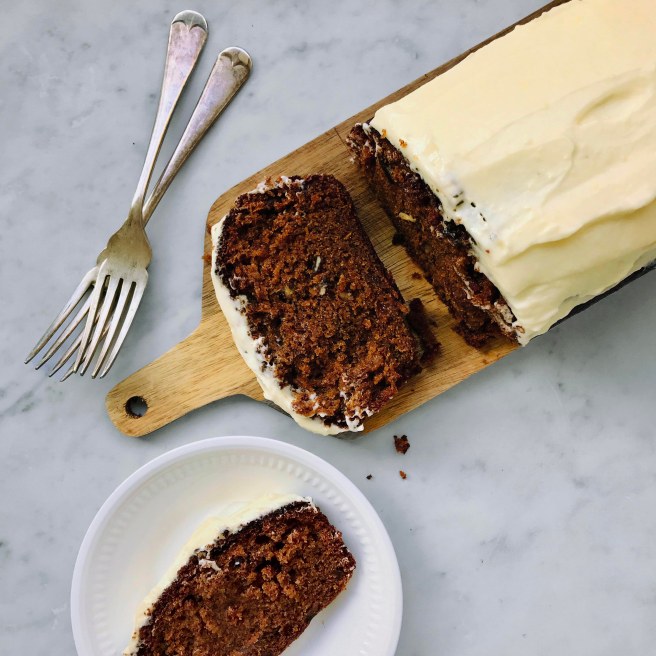
Come rain or shine (and I think it’s fair to say we’ve had a lot of both recently) there is always a good time for carrot cake. Although bursting with vitamins, antioxidants and fibre we all know the healthiest thing about a carrot cake is its name and the minuscule amount of cardio that goes with grating carrots – which frankly is the worst part about making carrot cake. But there is a reason this sweet vegetable deserves its place in the cake hall of fame, and that’s because it’s utterly delicious and worth grating your finger nails for. So why not whip up this seasonless classic and enjoy slice after slice with numerous cups of tea, because that is how carrot cake should be gobbled up – by the wedge load. Although I’m pretty sure Bugs Bunny would have a few words to say about that and not all of them so savoury.
Carrot cake loaf
Carrot cake loaf Make 1 loaf / Hands on time 35 mins / Total time 1 hr 45 mins / V You’ll need: 2 lb loaf tin, electric hand whisk
Juice of 1 orange
150g carrots, peeled and grated
150g soft brown sugar
80g self-raising flour
80g wholemeal flour
1 tsp bicarbonate soda
1 tsp baking powder
2 tsp ground cinnamon
1 tsp ground mixed spice
1 tsp ground ginger
50g walnuts, finely chopped
Pinch of salt
150ml extra virgin olive oil or cold-pressed rapeseed oil
2 eggs For the icing: 130g cream cheese
30g soft unsalted butter
65g icing sugar, sifted
Method
1. Grease the base and sides of a loaf tin with a bit of oil and line the bottom with baking paper. Put to one side and preheat an oven to 180°C/160°C fan/ 350°F/gas mark 4.
2. Peel and grate the carrot before weighing out the sugar, self-raising flour, wholemeal flour, cinnamon, ginger, mixed spice, bicarbonate of soda, baking powder and a pinch of salt in a large mixing bowl. Add the finely chopped walnuts and give it a good mix before incorporating in the grated carrots using a wooden spoon.
3. In a separate smaller bowl, whisk together the rapeseed oil and the eggs until combined. Pour into the carrot mixture and mix thoroughly. Spoon into the loaf tin and bake on the middle shelf for 50 mins before covering with foil for a further 10 mins (or until a skewer comes out clean).
4. While the cake is baking, make the cream cheese icing by whisking the butter and the cream cheese together in a bowl with an electric whisk. Fold in the icing sugar with a spoon before whisking again for a couple of minutes. Cover loosely with cling film and refrigerate.
5. Allow the carrot cake to cool completely in the tin before turning out and topping with lashings of cream cheese icing.
6. To store, keep the cake refrigerated for up to 3 days in an airtight container or wrapped in cling film. Ideally, allow the cake to come up to room temperature before serving.
Carrot cake loaf
If you’ve had a go at making any of my recipes, I’d love to hear from you. Follow me now @corrieheale and tag your recipe pictures using #corriesrabbitfood.
Side salads needn’t be a sad looking lettuce, cucumber and tomato combo. Jazz up your sides with these summery recipes along with a few tips and tricks.
Courgette carpaccio
Courgette carpaccio Yes, raw courgette can be delicious thing! Using a potato peeler, peel the 2 raw courgettes into ribbons and put in a large bowl. Squeeze over the juice of a lemon, 2 tbs of extra virgin olive oil and sprinkle over a large pinch of salt. Add a handful of chopped fresh dill and give it a good mix (being careful not to break up the courgette ribbons). Once everything is nicely dressed, pour out onto a large platter and dot with chunks of goat’s cheese. Drizzle with more extra virgin olive oil and serve.
Broccoli slaw with flaked almonds
Raw broccoli slaw Eating raw broccoli may seem odd but it’s no different than eating raw cabbage in a slaw and it’s very tasty. Prepare a head of broccoli by cutting it into bite-sized florets and discarding the chunky stalk. Pop in a large bowl with a quarter of a finely sliced red onion and put to one side. In a small frying pan, over a medium heat, infuse 1 clove of bashed garlic clove in a tbs of extra virgin olive oil until it starts to sizzle slightly. Take off the heat, discard the garlic clove and put the oil to one side. In a smaller bowl make the dressing by whisking together 150g of Greek yogurt, the juice of half a lemon, 1 tsp of cider vinegar, 1 tsp of Dijon mustard and the warm garlic oil until combined. Season well with salt and pepper before pouring over the raw broccoli.Mix together along with a couple of handfuls of flaked almonds. Pour into a bowl, season and dust with smoked paprika. Finish with a good drizzle of extra virgin olive oil and serve.
Mango mozzarella salad
Mango and mozzarella Mango and mozzarella make excellent bedfellows and a refreshing summer salad. Start by making the dressing by mixing the juice of a lime, 1 small garlic clove crushed and a tbs of extra virgin olive oil in a small bowl. Chop the mango into chunks and finely chop 2 spring onions, fresh coriander, half a deseeded red chilli and mix them together in a large bowl along with the dressing. Wash and chop 1 gem lettuce and add to the other ingredients and mix well. Drain 2 balls of mozzarella and tear into pieces with your fingers and add them to the salad. Season with salt and pepper and garnish with a sprinkle of dried chilli flakes.
Not quite ready for raw broccoli and exotic fruit in your salad? Try adding a bit of texture by sprinkling over a handful of seeds or some chopped nuts. Pumpkin seeds, sunflower seeds and pine nuts are a good option as they’re mild in flavour but add a nice bit of bite. You could also try including grains and pulses to make your salads more substantial. Chickpeas and kidney beans work well as do grains such as couscous and rice. Freshly chopped herbs can be a fragrant addition along with flavoured oils used in dressings. So, jazz up those side salads and have a party why don’t you!
Feta isn’t just for crumbling over salads, this ewe’s cheese is much more versatile than you may have originally thought. Softly brined, tangy, salty and ever so slightly sour and sweet in flavour, feta can add a welcome depth and texture to a number of dishes. Whipped, baked or even fried, this pleasing block of ‘white gold’ deserves to be centre stage to bring the taste of Greece to your dinner table.
Whipped feta and avocado dip
Whipped feta and avocado dip
Add 100g of feta to a food processor and blitz until it resembles breadcrumbs. Add a handful of fresh mint leaves and blitz again until combined. Add the flesh of a whole avocado along with 2 tbs of extra virgin olive oil and season with salt and pepper. Blitz for a final time until you have a smooth creamy consistency. Serves 2.
Fried feta on toast with honey & thyme
Fried feta on toast with thyme and honey
On a small side plate, add a heaped tbs of flour. Slice 100g of feta into two even slices and dust well in the flour. Beat an egg in a small bowl, season well with salt and pepper and pour onto a plate. Dip the cheese into the egg and cover evenly. In a small frying pan on a medium heat, add a tbs of oil. Once hot, carefully place the cheese in and fry gently on each side for a couple of minutes or until golden. Serve on a piece of toasted sourdough, drizzled in good quality honey and sprinkled with fresh thyme leaves. Serves 1.
Baked Feta
Baked Mediterranean feta
Preheat an oven to 200°C/180°C fan/400F/gas mark 6. Slice 1 red pepper along with half a red onion, 8 cherry tomatoes (halved) and 2 handfuls of black olives (halved). Smooth out 2 large pieces of kitchen foil and divide the chopped red pepper and arrange in the centre of each piece of foil. Season well with salt and pepper. Slice 200g of feta in half and pop each slice on top of the bed of sliced peppers. Top the feta with the onions and the cherry tomatoes (it doesn’t matter if a few fall off, just leave them at the side). Scatter over the olives and sprinkle with dried oregano. Season with salt and pepper before folding up the sides of each parcel and scrunching the top until sealed. Place both on a baking tray. Bake in the oven for 20 mins. Once cooked, carefully remove from the oven and open the parcels up just enough to drain away any excess liquid before sliding onto plates. Serve with warm pita bread and a good drizzle of extra virgin olive oil.
Jamie’s Feta & Cherry Tomato Rigatoni
Feta and cherry tomato pasta sauce
Half 20 cherry tomatoes and put in a large saucepan with 1tsp olive oil and 1 tsp of oregano. Cook on a medium heat for 5 mins until softened. Add 3 tbs tomato purée, 3 chopped garlic cloves, 1 grated courgette and season with salt and pepper. Cook on a medium to low heat with the lid on for a further 10 mins. Meanwhile, cook the pasta in a large pot of salted boiling water (follow packet instructions). Drain the pasta and pour straight into the sauce. Stir well before adding the chopped basil and 150g of crumbled feta. Stir again until combined and the cheese begins to melt. Serve topped with a drizzle of extra virgin olive oil and a good crack of pepper.
It’s all very well stocking up on canned goods, but they’ll be of little use unless you know how to get the best out of them – because watery pasta sauce and stew is going to get old pretty fast.
Roasted vegetable hummus bowl
Chickpea hummus bowls with roasted vegetables
A can of chickpeas can be thrown into pretty much anything. They’re great for bulking out recipes and adding additional plant-based protein to meals. However, chickpeas are rarely celebrated as the star ingredient, so wanted to push the humble chickpea centre stage. My recipe for hummus bowls not only encourages the use of surplus vegetables, but it’s easy to throw together and tastes delicious. In a large roasting tin, add a mixture of surplus veg, sprinkle with smoked paprika and season well with salt and pepper. Roast in the oven for 20-25 minutes at 200°C/180°C fan. Meanwhile make the hummus, by blending 1 can of drained chickpeas, 1 chopped garlic clove, 1.5 tbs of tahini, the juice of half a lemon, 1 tbs of water and 1 tbs of extra virgin olive oil. Once blended, spoon generously into bowls and top with the roasted vegetables, along with a drizzle of extra virgin olive oil. Serve with toasted pita bread.
Roasted butterbean traybake
Sweet Potato & Butterbean Traybake
Butterbeans are often overlooked by shoppers, but this kidney shaped pulse generally makes itself at home in a big hearty stew. These mealy yet mild flavoured beans, can be tossed into soups, casseroles and even blended into mash. However, I prefer to roast them in a bit of stock along with sweet potatoes, to make a hearty traybake for two. Preheat an oven to 200°C/180°C fan. In large casserole dish, add a roughly chopped sweet potato along with a can of drained butterbeans and half a sliced red pepper. Pour over 175ml of stock and season well with salt, pepper and smoked paprika. Give it a good stir and bake in the oven for 45 minutes. Once cooked, remove from the oven and make two wells using a spoon. Crack a free-range egg into each well and bake for a further 6-8 minutes, depending on how you like your eggs. Finish by topping with chopped fresh coriander and serve with Greek yogurt and a drizzle of extra virgin olive oil.
Tinned plum tomato sauce al’arrabiata
Penne al’arrabiata
Pasta sauce is a great way to eat tinned tomatoes but to avoid a watery disappointment, follow my simple pasta sauce recipe. I often opt for tinned plum tomatoes, as I prefer the chunkier texture they bring, but ordinary will also work. Add 2 chopped garlic cloves to a tbs of warm (not hot) oil in a large saucepan along with a pinch of chilli flakes. Allow to infuse over a low/medium heat for a few minutes. Add one can of plum tinned tomatoes and a tbs of tomato puree. Break the plum tomatoes up with a spoon and stir. Season well with salt and pepper, up the heat and bring to the boil. Simmer for 5 minutes and your sauce is ready. Serve with your choice of pasta and top with either mozzarella or Parmesan.
Black bean tostada bowls
Mexican Tostada Salad
A can of black beans in my house inevitably ends up either in a smoky chill, wrapped up in a burrito or squashed into a quesadilla. Although as the weather heats up over the coming months, I’m more likely to throw them into Mexican tostada salad. To make the tortilla bowls, simply place each tortilla into a heatproof bowl each, with a ball of foil in the centre to prevent them from falling in on themselves. Bake in an oven for 15 minutes at 200°C/180°C fan. Meanwhile, in a large bowl, combine 1 can of drained black beans with, 1 can or drained sweetcorn, half a chopped cucumber, 3 chopped spring onions, 2 handful of cherry tomatoes, 1 chopped cos lettuce, half a deseeded chilli (finely diced) and 50g of grated cheddar. Mix well and put to one side. To make the dressing, combine 1 tsp of homey, 1 tsp of Tabasco, the juice of 1 lime and 1 tbs of extra virgin olive oil. Pour the dressing over the salad and mix well, before spooning into the edible tortilla bowls.
Thai green lentil soup
Thai green lentil soup
Okay so not a canned good, but still a store cupboard staple that could do with a creative injection. Red and green lentils are superhero’s when it comes to adding a bit of bulk to stews, soups and even Bolognese. My Thai green lentil soup not only adds a bit of fragrant flare to the humble lentil, but it’s a hearty meal that will see you through self-isolation. In a large cooking pot with a lid, sweat 1 chopped onion in a tsp of oil, over a medium to low heat for 10 mins. Once soft, add a piece of grated ginger, 2 chopped garlic cloves and 50g of Thai green curry paste. Give it a good stir and cook for 2 minutes. Add 150g of chopped sweet potato, 1 can of coconut milk, 1 litre of stock, 150g of dried green lentils and a bashed lemon grass stork (optional). Turn down the heat and simmer for 20 mins, stirring occasionally. Cut the storks off a large handful of coriander and add them to the soup. Cook for 5 more minutes. Finally take off the heat, fish out the lemon grass and blend. Serve topped with the remaining chopped coriander leaves.
Join me next time for part 2. In the meantime, visit learningwithexperts.com for more foodie blogs.
Now, it has to be said, I’m not a huge fan of cauliflower. This can be problematic – especially these days, as it seems to have become the go-to vegetarian dish in most restaurants. Whole-roasted, salt-baked, deep-fried, curried, pickled, pureed, battered and sliced into steaks, cauliflower is thrust upon my plate at any given moment. So, allow me to thrust my bang-bang cauliflower bites onto yours and see how you like it – I like it very much.
Bang bang cauliflower bites Serves 2 as a starter or makes 1 tray of canapés / hands on time 15 mins / total time 45 mins / V VnDf 🌶🌶 You’ll need: Non-stick baking tray and cocktail sticks (if serving as canapés)
1 medium cauliflower, cut into florets (roughly 550g)
1 tbs extra virgin olive oil
2 tbs sweet chilli sauce, I use Blue Dragon
1 ½ tsp Sriracha + extra for serving
Juice of ½ a lime
½ tsp sea salt flakes
2 handfuls panko breadcrumbs
½ tsp smoked paprika
Small handful of fresh coriander to serve (optional)
Method
1. Preheat an oven to 220°C/200°C fan/425°F/gas mark 7. Prepare the cauliflower by removing the leaves and the stalk (cauliflower leaves are delicious and great in a stir fry, so don’t feel you need to bin them). Pull apart the florets and chop the larger florets in half or into smaller bitesize pieces.
2. In a large bowl, whisk together the olive oil, chilli sauce, Sriracha and the juice of half a lime until combined. Add the cauliflower florets and stir until well coated.
3. On a large plate, add panko breadcrumbs and sprinkle with smoked paprika. Give it a stir before spooning over half the coated florets. Turn the cauliflower over in the breadcrumbs until each is well coated and place on a non-stick baking tray or a tray lined with baking paper. Repeat this process with the remaining cauliflower and bake in the oven for 30 minutes.
4. Serve immediately sprinkled with freshly chopped coriander and a small bowl of Sriracha for dipping.
5. If you’re making canapés, skew each floret with a cocktail stick and serve along side a dipping bowl of Sriracha for your guests to enjoy.
Bang bang cauliflower bites
If you’ve had a go at making any of my recipes, I’d love to hear from you. Follow me now @corrieheale and tag your recipe pictures using #corriesrabbitfood.
V– Vegetarian Vn– Vegan Df– Dairy free 🌶🌶 – Medium hot


 Preheat an oven to 220°C (200°C fan). Peel and chop two large carrots and pop them on a baking tray. Sprinkle with salt and pepper and spray with spray oil. Pop them in the oven for 10 mins before giving them a quick turn with a spatula. Continue to cook for a further 10 mins. Meanwhile chop a small handful of dill and make the dressing by combining 1 tsp lemon juice, 1 tsp of extra virgin olive oil and a sprinkle of salt and pepper. Once the carrots are roasted, leave to cool fully. Tip the cooled carrots into a bowl and stir in the dressing and the chopped dill. Put in an airtight container and store in the fridge for up to three days.
 Cucumber, feta and olive salad: