Mushroom katsu curry

Mushroom Katsu Curry

Katsu curry doesn’t have to be made with chicken you know, a chestnut mushroom rolled in breadcrumbs can do just as well… I think… Not that I’ve ever tried chicken. Well I did once, I ate a chicken burger from New York Chicken & Ribs in Letchworth Garden City when I was 15 but I was so drunk, I don’t remember what it tasted like. Probably pretty good considering anything fried and greasy tastes amazing when you’re inebriated.
Anyway, realising chicken katsu curry is in fact vegetarian, (minus the chicken on course) I decided to give it a go. It’s not that hard to make but it can be a bit of a faff, so I tend to make double the sauce and freeze the rest for later. This means that when I’m feeling lazy, (which is a lot) I can forget the breaded mushrooms altogether and simple pour the silky sauce over some roasted butternut squash, it’s divine and a little less fiddly. However, if you’ve never tried katsu curry, then I highly recommend you start with this mushroom version, it’s well worth getting your hands a bit messy for.
Unlike an Indian curry, Japanese curry is a bit sweeter, not as spicy but has just enough chilli to warm through you as you eat it. Perfect for people afraid of a bit of heat (like my mum). Enjoy, or as they say in Japan
楽しんで… (I think).


Mushroom katsu curry
Serves 2 / Hands on time 30 mins / Total time 1 hour 10 mins / V Df 
Sauce
1 tbs sunflower or vegetable oil
1 onion, peeled and chopped
5 garlic cloves, peeled
2 medium carrots, peeled and chopped
2 tbs plain flour
1 tbs medium curry powder
600ml vegetable stock, I use Knorr
1 tbs reduced salt soy sauce
1 bay leaf
2 tsp honey
½ tsp garam masala
Mushrooms
Rapeseed spray oil (see tip below)
8 large chestnut mushrooms
2 handfuls 
Pako breadcrumbs
2 medium eggs, beaten
Salad dressing
1 tsp sesame oil
1 tsp soy sauce,
1 tsp rice vinegar
sprinkle of sesame seeds
To serve 
250g sushi rice and salad leaves


TIP: Buy an empty spray bottle and fill it with your favourite cooking oil – I use rapeseed oil. This distributes the oil evenly over food and is a great way of cutting calories when roasting or frying as you don’t need to use as much.


Method
1. Preheat oven to 200C°/180°C fan/400°F/gas mark 6. If making sushi rice do this first and follow the packet instructions. To make the sauce, fry the chopped onion and whole garlic cloves in the oil in a large saucepan, on a medium heat, for a couple of minutes. Add the chopped carrots, give it a stir and put the lid on. Continue to sweat for a further 10 minutes.
2. Add the plain flour and the curry powder and cook for a minute, stirring continually. Add the stock in a slow steady stream and continue to stir (this avoids any lumps). Add the bay leaf, soy sauce and honey and bring to the boil. Reduce to a simmer and cook for 20 minutes.
3. Meanwhile, beat the eggs in a bowl with a fork and pour out a generous amount of pako breadcrumbs onto a large plate. Spray a large oven tray with oil and pull the storks out of the mushrooms. Take each mushroom and dip it in the beaten egg. Once covered, roll it in the pako breadcrumbs until well coated and place on the oiled baking tray. Repeat this process until all your mushrooms are covered. Spray with oil and put in the oven for 20 minutes, turning halfway through.
4. Add the garam masala to the sauce and season with salt and pepper. Give the curry a stir and take off the heat. Pass the curry through a sieve using a wooden spoon to help force it though. (If you prefer a chunkier sauce, don’t bother sieving it but remember to remove the bay leaf. Or if you like a smooth but thick sauce, sieve it but add the vegetables back in (minus the bay leaf) and blend with a hand blender). Pour into a new pan and heat on a low heat to keep the sauce warm until your mushrooms are ready.
5. If making a salad, mix the dressing ingredients together and dress 2 handfuls of mixed leaves in a bowl.
6. Remove the mushrooms carefully from the oven and serve on top of the curry sauce, accompanied with sushi rice and salad.


TIP: To make the sushi rice into domes, simply spoon sushi rice into a tea cup and mold to the cup by pushing down with a spoon. Turn out onto a plate.


If you’ve had a go at making any of my recipes, I’d love to hear from you. Follow me now @corrieheale and tag your recipe pictures using #corriesrabbitfood.


V– Vegetarian    Df– Dairy free
 The curry sauce is suitable for home freezing. Keep up to 3 months 


Marmite grilled cheese

Marmite Grilled Cheese

Let me make something clear. A grilled cheese is not the same as a cheese toastie. For thirty-three years I thought they were the same thing, until my boyfriend Jamie made me one on my birthday last week for breakfast (I know, he’s the best).
So the main difference is that the grilled cheese is essentially the bigger, fatter, American cousin of our more humble cheese toastie. Traditionally it’s made with shitty white bread but as I can’t bring myself to buy that (mainly because I love shitty white bread and would end up eating the whole loaf) I’m sticking to the less traditional, more rustic wholemeal loaf. Not only is it the healthier choice but it’s all I have in the house and can’t be bothered to go to shops. I think if I had planned this better, I would have chosen sourdough but my wholemeal loaf is just as robust and will give a good textural contrast with the oozy cheese.
The other main difference between the two, is that you butter the outside of the bread and fry it in a frying pan, no grilling involved – not sure why it’s called a grilled cheese but there you go. Buttering the outside of the bread gives the grilled cheese a deliciously crisp, golden coating unlike it’s dryer cousin. I do love a cheese toastie though and regularly make one after a drunk night out. Although I nearly always opt for a cheese and Branston pickle filling like my mama used to make. Good old Branston.
Anyway, unlike the traditional grilled cheese, I’m filling mine with cheese and Marmite but if you’re not a Marmite fan, then simply leave it out, I won’t be offended.


Marmite grilled cheese
Serves 1 / Hands on time 15 mins / Total time 15 mins / V
You’ll need…
A non stick frying pan – preferably with a lid
2 pieces of bread (white is the traditional choice, although I prefer brown)
60g medium vegetarian cheddar, finely grated
1 tsp Marmite
2 tsp boiling water
Spreadable unsalted butter


TIP: You don’t just have to stick to cheddar, feel free to mix it up and add up to 3 melty cheeses of your choice. Personally I think a mixture of red Leicester and Emmental would be momentous. 


Method
1. In a small bowl, add 1 tsp of Marmite and 2 teaspoons of boiling water. Mix together to loosen the Marmite until you have a brown watery liquid. Finely grate the cheese (finely grating helps the cheese melt faster) and pop in a bowl. Pour the Marmite liquid over the cheese and stir well. Put to one side.
2. Butter each slice of your chosen bread (you can use any bread you like really, just make sure it’s not too thick or your cheese will struggle to melt). Heat a medium sized saucepan on a medium to high heat for a couple of minutes until hot and add a knob of butter. Once the butter has melted and is sizzling, place both slices of bread carefully in the pan butter side down and spoon the cheesy Marmite mixture evenly onto both slices. Top the frying pan with a lid (if you have one) or place a large heatproof bowl over the top of the slices – this helps the cheese to melt.
3. Once the cheese has melted, remove the lid and sandwich the slices together. Press the sandwich down with a spatular and turn the heat down to medium. Keep the sandwich moving in the pan and continue to press down on it for a couple more minutes before flipping over. Once the crust is nice and golden and the cheese is suitably oozy, remove from the pan and enjoy immediately.


Marmite Grilled Cheese

If you’ve had a go at making any of my recipes, I’d love to hear from you. Follow me now @corrieheale and tag your recipe pictures using #corriesrabbitfood.


V– Vegetarian


Roasted vegetable couscous with goats cheese & harissa

Vegetable Couscous with Goats Cheese
Vegetable Couscous with Goats Cheese & Harissa

Why I thought it was a good idea to roast vegetables on the hottest day of the year, in my tiny 2 bedroom flat is beyond me but I’ve never claimed to be the smartest tool in the box… Hang on that doesn’t sound right. Why would a tool need to be smart? Let’s check Google…
Right so it’s the ‘sharpest’ tool in the box. Think I’ve just proved my point.
Anyway, my mum used to make a Delia Smith recipe similar to this one, she even managed to dig the book out for me to look at but the recipe was so long I got bored and walked off. I mean it’s hardly rocket science is it? Make some couscous, roast some veg, top with cheese, BOOM! Come on Delia sort it out, I don’t have 9 hours to make my dinner. Actually I should be nice to Delia, she launched Sainsbury’s Magazine back in 1993 who currently employ me, so I should stop talking now. Love you Delia, you da best!


Roasted vegetable couscous with goats cheese & harissa
Serves 4 / Hands on time 25 mins / Total time 1 hour 10 mins / V
250g couscous
350ml vegetable stock, I use Knorr
½ red onion, peeled and roughly sliced
1 medium aubergine, cut into chunks
5 baby leeks or 1 regular roughly chopped
Handful cherry tomatoes, roughly 10
200g butternut squash, peeled, seeds removed and cut into chunks (I buy it already peeled and chopped)
1 red pepper, sliced
3 large garlic cloves, peeled and smashed
1 tbs olive oil
150g vegetarian firm goats cheese
Handful fresh basil, chopped 
Harrissa dressing
Juice of a lemon
1 tbs extra virgin olive oil
2 tsp honey
2 tsp harrissa paste


Method
1. Preheat your oven to 220°C/200°C fan/425°F/gas mark 7. Measure out your couscous and pour into a large bowl. Pour over the vegetable stock, making sure all the couscous is covered. Cover the bowl with cling film and put to one side.
2. Roughly chop the aubergine, red onion, red pepper and butternut squash and put into a large roasting tray. Scatter with a handful of cherry tomatoes, whole baby leeks and the peeled and bashed garlic cloves. Add the olive oil and give it a good mix until the vegetables are evenly coated. Season with salt and pepper and roast in the oven for 30 minutes.
3. Meanwhile, make your dressing by combining the juice of a lemon, harrissa paste, honey, extra virgin olive oil and season with salt and pepper. Put to one side.
4. By now your couscous should be nice and soft. Uncover the bowl and using a fork, scrape across the top to start loosening it. Keep the pressure light and keep scraping until you get to the bottom of the bowl and your couscous looks light and fluffy. Put to one side.
5. After half an hour, carefully remove your veg from the oven, give it a bit of a shake and pop back in for another 10 minutes. Meanwhile, roughly chop a handful of basil leaves and cut your goats cheese into chunks and put to one side.
6. Once your veg is roasted, remove from the oven but leave the oven on. Carefully scoop out the veg and pop it onto a plate. Then in the same baking tray, spread out the couscous and top evenly with the roasted vegetables. Scatter with goats cheese and put back in the oven for a further 10 minutes. Serve topped with fresh basil and good drizzle of Harissa dressing.


Vegetable Couscous with Goats Cheese & Harissa

If you’ve had a go at making any of my recipes, I’d love to hear from you. Follow me now @corrieheale and tag your recipe pictures using #corriesrabbitfood.


V– Vegetarian


Veggie salad niçoise

Veggie Salad Niçoise

I’ve been eating out quite a lot recently and something really annoying has started to happen on menus across the land.
Warm asparagus salad with poached hens egg… Spiced aubergine pilaf with poached hens egg… Sweet potato and harrissa hash topped with a poached HENS EGG… “Oooh a poached hens egg, how exotic, I’ll have that please.” AGHHHHHH!
A hens egg is surely just an egg. News flash, chickens are hens, well female ones are and as we all know, only female chickens (i.e. hens) can lay eggs. Silently and pretentiously, the hens egg seems to have swept onto menus across the capital without anyone even noticing. Where have we all been?!
So next time you see it on the menu, ask for just a regular egg and see what happens. “Oh, is a hens egg just a regular egg? Then why doesn’t it just say that?” You utter politely before picking up your table and throwing it across the room. On that note lets move swiftly on to my salad Niçoise with boiled ‘hens’ egg (okay I’ll stop it now).
Salad Niçoise originated in the French city of Nice and is traditionally made up of a mixture of Niçoise olives, anchovies, tomatoes and hard boiled eggs. I was surprised to learn that a traditional Niçoise salad doesn’t include tuna, french beans or even potatoes but I guess every recipes it subject to interpretation. However, I’ve included french beans and potatoes in mine because it’s just not a Niçoise salad without them in my opinion. I’ve also substituted the anchovies for a tangy black olive and lemon dressing to give it the salty zing without the fish. Bon appétit. 


Veggie salad Niçoise
Serves 2 / Hands on time 30 / Total time 35 mins /
V Gf 
You’ll need:
A pestle and mortar
3 eggs
1 cos lettuce
1 handful of pitted black olives
100g french beans
300g new potatoes/Jersey royals
4 ripe tomatoes cut into eights
¼ cucumber, peeled and chopped
Handful of basil torn
Juice of half a lemon
Dressing
Small handful of basil leaves
60g black olives
Juice of half a lemon
1 medium garlic clove, peeled
1 tbs extra virgin olive oil
1 tsp red wine vinegar or balsamic vinegar


Method
1. Put the eggs in a small saucepan and cover with boiling water. Boil for 7 minutes. Once boiled, drain and cover in cold water and put to one side. Cut the larger new potatoes in half but leave the small ones whole. Put in a large saucepan and cover with boiling water. Season the water with salt and bring to the boil. Simmer for 15 minutes.
2. Meanwhile, make your dressing by putting 60g of pitted black olives in a pestle and mortar along with a peeled garlic clove, a tbs of extra virgin olive oil, a tsp of red wine vinegar, small handful of basil leaves, the juice of half a lemon, salt and pepper. Carefully grind the ingredients together until you have a rough paste.
3. Cut your tomatoes into eights and peel and chop your cucumber. Put in a large bowl along with a handful of torn basil, a handful of pitted black olives and season with salt and pepper.
4. By now your potatoes should be cooked but don’t remove them from the heat just yet. Add the trimmed french beans to the pan and cook for a further 5 minutes. Drain the potatoes and beans and cover in a stream of cold water to prevent them from cooking further. Leave to drain.
5. Line a large salad bowl with cos lettuce and peel your eggs. Slice into quarters and put to one side. Tip the warm potatoes and the beans into the bowl along with the rest of the salad mixture and top with the dressing. Give it a good stir and tip the whole lot on top of the lettuce.
6. Place the sliced eggs on top, squeeze over the other half of the lemon, drizzle with extra virgin olive oil and season with salt and pepper.

Veggie Salad Niçoise

If you’ve had a go at making any of my recipes, I’d love to hear from you. Follow me now @corrieheale and tag your recipe pictures using #corriesrabbitfood.


V– Vegetarian    Gf– Gluten free


Easy overnight oats

Easy Overnight Oats
Easy Overnight Oats

Lets all pretend to be Deliciously Ella for a day and make some overnight oats shall we? Now I know Ella didn’t invent overnight oats but I can picture her making them more than anyone else in the world. I can see her now, pouring oats, seeds and nuts out of individual Kilner jars and covering them with homemade almond milk, before gliding upstairs to bed in her silk pyjamas and White Company socks. She closes her bedroom door before quietly sobbing over the fact she can’t have a Domino’s. I mean she literally can’t, there isn’t a single thing on that menu that poor girl can eat. This in turn, has made me a lot more humble about eating pizza ‘I’m doing this for you Ella’ I think, as I stuff a large slice into my face. Delicious.
But we’re not having pizza today folks, although I did last week, thus the need for a healthy breakfast. So lets totes eat some oats (see what I did there) and save up all our delicious calories for pizza, cakes, pies and Percy Pigs (veggie ones of course).

This post is dedicated to all those who lost their lives last Saturday night in the London Bridge terror attack. My heart goes out to their friends and families.


Easy overnight oats
Serves 1 / Hands on time 5 mins / Total time 5 mins + chilling  / V Vn Df 
50g oats
1 tbs cashews
1 tbs pumpkin seeds
1 tbs flaxseed mill (optional)
175ml coconut milk
¼ tsp vanilla extract
1 tbs maple syrup
1 passion fruit, seeds scraped out
Handful of fresh berries
Lemon wedge


Method
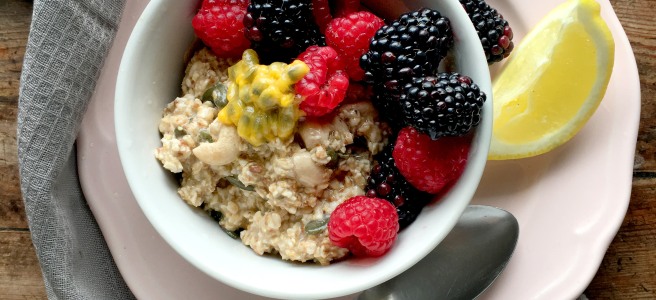
1. Measure out 50g of oats and add to an airtight tupperware container with a lid. Add 1 tbs of flaxseed mill, cashews and pumpkin seeds and give it a quick stir.
2. Add the coconut milk, a Tbs of maple syrup and a quarter tsp of vanilla essence. Give it a quick stir and then pour over the oats. Give it another good stir with a spoon, making sure all the oats are covered. Pop the lid on and refrigerate overnight.
3. Spoon into a bowl, top with passion fruit, berries and a squeeze of lemon.

Easy Overnight Oats

High protein version
Serves 1 / Hands on time 5 mins / Total time 5 mins + chilling  / V Vn Df
25g oats
15g cashews
15g pumpkin seeds
10g flaxseed mill
1 tsp chai seeds
30g frozen mixed berries
100ml milk (I use oat milk but any you like)
1 tsp maple syrup
Put all above ingredients in a container and mix well. Refrigerate overnight. Serve with Greek yogurt and your choice of nut butter for an extra protein hit. 


If you’ve had a go at making any of my recipes, I’d love to hear from you. Follow me now @corrieheale and tag your recipe pictures using #corriesrabbitfood.


V– Vegetarian    Vn– Vegan    Df– Dairy free


Blueberry & lemon drizzle cake

Blueberry Lemon Drizzle Cake
Bueberry Lemon Cake Drizzle

Good job I managed to take this picture before I dropped this cake all over the floor. Don’t worry, I managed to scoop most of it up within three seconds, only two slices were covered in dog hair. I really should clean my kitchen.
Anyway, dropping a cake doesn’t really matter when the person you’re making it for is no longer around to eat it. This week my dear old dad, who died seven years ago in a motorbike accident, would have turned 64. Crikey seven years, what the hell have I been doing for seven years? I got a new job and bought a  hoover but right now that’s all I can think of. I really should use that hoover. Still can’t believe he’s gone.
So I’m going to go and have a cry now so will keep this brief. Happy birthday for Thursday dad, I’ll be sure to scoff this cake I made for you on your behalf, dog hairs and all.


Blueberry & lemon drizzle cake
Makes 1 loaf / Hands on time 25 mins / Total time 1 hr 15 mins + cooling /
V
You’ll need: A 9 inch loaf tin and a food mixer.
210g unsalted butter
130g plain flour
¼ tsp baking powder
¼ tsp salt
Zest of a lemon
3 medium eggs
2 medium egg yolks
210g golden caster sugar
1 tsp vanilla essence
85g fresh blueberries
For the drizzle
Juice of a lemon
30g golden caster sugar


Method
1. Preheat your oven to 160°C/140°C fan/325°F/gas mark 3. Grease a loaf tin with butter and line the bottom with baking paper. Put to one side.
2. In a small saucepan melt the butter on a low heat. Once half the butter has melted, take off the heat and leave to one side, it will continue to melt while it cools.
3. Zest and juice your lemon but keep them separate as you’ll need the zest for the cake but the juice for the drizzle. Put both to one side.
4. Sieve the flour into a large bowl along with the baking powder and salt, put to one side. Place near your mixer. Crack 3 eggs into your mixer, followed by 2 egg yolks, caster sugar and vanilla essence. Beat on a medium high speed until thick and pale (this should take about 5 mins). Reduce the speed to low and add the lemon zest and half the flour. Mix until only a few streaks remain and then add the rest. Once combined increase the speed to a low medium and slowly pour in the melted butter.
5. Ladle half the mixture into your loaf tin and top with the fresh blueberries. Add the rest of the mixture on top. (It’s important to line your loaf tin with baking paper as the blueberries will sink to the bottom during baking. Without baking paper most of your blueberries will stay in your loaf tin when you turn it out and we don’t want that).
6. Bake for 50-55 minutes until risen and golden in colour. To check the cake is cooked, insert a skewer into the middle, if it comes out clean, the cake is ready. Leave to cool in the tin for 10 minutes. Meanwhile make the drizzle by mixing together 30g of sugar and the juice of a lemon.
7. While your cake is still warm, prick it with a skewer or fork and pour over the drizzle. Leave to cool completely before turning out (the bottom of the cake will be quite soft because of the blueberries so avoid putting it on a cooling rack, it will only seep through the holes). Cut into thick slices and serve with tea.

Bueberry Lemon Cake Drizzle

If you’ve had a go at making any of my recipes, I’d love to hear from you. Follow me now @corrieheale and tag your recipe pictures using #corriesrabbitfood.


V– Vegetarian


Parisian gratin

Parisian Gratin for two

Okay so what’s the difference between a gratin and potato dauphinoise? Basically nothing, although I’ve always identified dauphinoise as a side dish and gratin as a main but essentially, they’re the same. Layers of finely sliced potato cooked in lashings of double cream and cheese, err yes please. And who do we have to thank for this? The French of course. I wish I was French, I’d love to eat cheese, drink wine and wear black clothes draped over my slender bird like body… Not quite sure where that came from.
Anyway, unfortunately I’m not French so literally can’t bring myself to pour a whole pint of double cream over my dinner so decided to make a slightly healthier version, based on a gratin I ate in Paris back in February.

The original gratin from Le Bistro des Augustins. Paris 2017.

I was a bit sceptical about going to Paris at first because any pleasant memories I had, had been marred by me picking ham out of every meal on a school trip once. However, it appeared Paris was no longer the veggie-phobic city it once was.
I ordered the only meat-free option available which was a kind of mixed vegetable gratin. I didn’t like the sound of this, a bowl of vegetables covered in cheese, ‘great’ (said in an unenthusiastic tone) but as usual, I was wrong. A handful of diced vegetables formed the base and was topped with gooey, cheesy, buttery potatoes, yum! We scooped, scoffed and quaffed the night away before waddling back to our hotel feeling like we were going to die (in a good way). Bon appetite!


Parisian gratin 
Serves 2 / Hands on time 40 mins  / Total time 1 hr 10 mins / V* Gf
You’ll need:
Casserole oven-proof dish approx 25cm x 20cm and large cooking pot with a lid, mandoline slicer (optional) 
25g unsalted butter
3 garlic cloves, peeled and grated
½ courgette, finely diced
1 tsp sea salt flakes
1 tomato, de-seeded and finely chopped
1 tsp Herbs de Provence
Pinch of ground nutmeg
300ml semi-skimmed milk
200g Crème fraîche
600g potatoes thinly sliced (skins on)
150g Gruyere*, Emmental or mature cheddar, grated (you can use any cheese you like really as long as you can grate it – the stronger the cheese the better)
French bread and salad leaves to serve


Method
1. In a large pot with a lid, add the butter and place over a medium heat. Once melted, add the garlic, courgette, tomato and salt and cook for 5 mins.
2. Meanwhile finely slice the potatoes as thin as you can using either a knife or a mandoline and put to one side – I tend to leave the skins on but peel if you prefer.
3. Add the milk, 1 tsp of herbs de Provence and a pinch of nutmeg. Stir and bring to the boil before turning the heat down to medium low.
4. Carefully submerge the potatoes in the milk (don’t worry if you can’t submerge them all, they will be cooked by the steam). Cover with a lid and simmer for 5 mins. Uncover, and roughly turn the potatoes over with a spoon, being careful not to break them up too much. Cover again and simmer for a further 5 mins. Preheat an oven to 220°C/200°C fan/425°F/gas mark 7.
5. Remove from the heat and using a slotted spoon, lift half the potatoes out of the sauce (leaving as much sauce as possible behind) and spread evenly in the casserole dish. Season with salt and pepper and cover with half the grated cheese.
4. Lift the rest of the potatoes out (again leaving as much sauce behind as possible) and spread evenly on top of the cheese. Add the crème fraîche to the remaining sauce and vigorously beat with a whisk (this prevents the sauce from splitting). Pour the sauce over the potatoes. Sprinkle with the rest of the cheese and season with salt and pepper.
5. Bake in a hot oven for 20-30 mins or until the gratin is bubbling up the sides and brown on top. Leave to sit for 5 mins before serving with French bread, lightly dressed leaves and good bottle of red wine. Well it’s not Parisian without wine!

Parisian Gratin for two

If you’ve had a go at making any of my recipes, I’d love to hear from you. Follow me now @corrieheale and tag your recipe pictures using #corriesrabbitfood.


Gf– Gluten free
*Gruyere cheese is not vegetarian.


Homemade salad boxes

Homemade Salad Boxes

I spend a fortune on salad boxes. At least twice a week, I find myself at a salad buffet, filling up a teeny-tiny plastic tupperware box that I could frankly make myself for half the price.
“That will be £6.50 please” says a skinny girl with dreadlocks.
“£6.50? But I only got a small box?!” I blurt out.
“Yeah but you pay by weight” she says, looking me up and down. What the hell did she mean by that? She snatches my tenner our of my hand and replaces it with a few pound coins.
Have I just been robbed and insulted? When did we start paying for things by weight? No salad should ever cost more than a fiver, no matter how much it weighs or how much halloumi you manage to cram in it.
I look down disappointedly at my little box, for something so small, it really is rather heavy (the girl may have had a point). It looks visibly stressed, all angry and shmooshed pressed up against the plastic. Sorry salad, I feel like I’ve killed you.
Anyway I tip it out onto a plate and scoff the lot at my desk and as usual, it’s under seasoned, underwhelming and disappointing.
Well no more! I’ve decided to take matters into my own hands and make my own buffet style salad, minus the disappointment.
I find the key to building a good salad box is to keep it simple but a bit exotic. Treat yourself to a few of your deli favourites, add a bit of roasted veg, a sprinkle of seeds and you’re good to go. Take that dreadlock girl! You’re not getting you’re hands on my £6.50 this week.


How to build your salad:
2 handfuls of leaves: If buying a bag of salad I would stick to either rocket, watercress or spinach, they last longer than the mixed varieties. I tend to buy baby gem or just a regular lettuce and chop it up as I need it. It’s cheaper and can last up to a week.

1 handful of vegetables: Here are a few ideas I like that are quick and easy to make yourself. You only need to pick one of these… Baked sweet potato/butternut squash, minted new potatoes, roasted carrots with dill and lemon (see recipe) mixed roasted vegetables, tomato and onion salad (see recipe), roasted peppers. Feeling lazy? Then shop bought deli artichokes or even jarred peppers such as Karats Roasted Red Peppers are delicious and a great substitute.

Pick your star: Mine is nearly always cheese, 50g of either feta, mozzarella, goats cheese or halloumi. For a more substation lunch though, I like to also include either a boiled eggs (hard boiled these can last up to a week in the fridge), half an avocado or even quorn. (If you eat meat this is your chance to add a bit of cooked chicken or fish).

Make it hearty with 2 tablespoons of… Couscous, brown rice, five bean salad (see recipe) quinoa, pasta salad (see recipe). You don’t need to make much of this, 100g should be enough for the week.

A sprinkle of crunch: This is optional but I always like to sprinkle my salads with either pumpkin seeds, sunflower seeds, croutons or pomegranate seeds to give it some bite.

Carbs: I literally can’t eat a salad without at least a little bit of bread. I like a mini pitta, a small brown flat bread or even a couple of oat cakes.

Dress is up: 1 tablespoon of either homemade dressing (see recipe) shop bought dressing, humous, zatziki or even a good drizzle of chilli sauce.

Extra acidity: Again this is optional but I always think a salad is greatly improved by acidity, tang and bit of heat. I always include a few olives, a sprinkle of chilli flakes and some sort of pickle, whether is be a couple of pickled onions, gherkins, pickled chillies or jalapeños. 

So there you have it! The building blocks to make your very own buffet salad without the buffet. Here are a few of my favourite staples to get you started…


Roasted carrots with dill and lemon dressing:
Preheat an oven to 220°C (200°C fan). Peel and chop two large carrots and pop them on a baking tray. Sprinkle with salt and pepper and spray them with spray oil. Pop them in the oven for 10 minutes before giving them a quick turn with a spatular. Continue to cook for a further 10 minutes. Meanwhile chop a small handful of dill and make the dressing by combining 1 teaspoon of lemon juice, 1 teaspoon of olive oil and a sprinkle of salt and pepper. Once the carrots are roasted leave to cool fully. Once cool, tip the carrots into a bowl and stir in the dressing and the chopped dill. Put in an airtight container and keep for up to 3 days in the fridge.


Five been salad:

I literally buy a can Napolina Five Beans, strain them and give them a quick rinse (not too much or you’ll lose the flavour as they are slightly spiced). I then add a finely chopped stick of celery and that’s it! Pop in an air tight container and use within 3 days.


Cucumber, feta and olive salad:
Peel and chop half a cucumber and pop it into a bowl with a sprinkle of salt. Roughly chop a large handful of black pitted olives (roughly 80g) and add this to the cucumber. Crumble over half a pack of feta cheese (around 100g) and give it all a good mix. Finish with a  drizzle of extra virgin olive oil and keep in an airtight container for up to 3 days.


Tomato and onion salad:
Slice 2 tomatoes along with a few slices of peeled red onion. Season well with salt and black pepper and finish with a  drizzle of olive oil. Keep in an airtight container for up to 3 days. (This is so easy that you don’t even really need to pre-prepare it, you could just chop them up in the morning if you have time before work.)


Whole baked sweet potato: Preheat an oven to 220°C (180°C fan). Carefully score a sweet potato with a sharp knife along the skin and insert into the centre. Withdraw the knife and pop in the oven for 40 minutes turning half way through. Leave to cool before cutting up and adding to salads. Wrap in foil and keep in the fridge for up to 4 days.


Pesto pasta salad: Cook 50g wholewheat pasta according to instructions. Once cooked, drain and cool with a stream of cold water before returning it back into the saucepan. Cover with cold water and leave to cool. Drain again. Stir through a tablespoon of your favourite pesto (I like Sacla’s Chargrilled Aubergine). Transfer to an air tight container and refrigerate for 3 days.


Dressing: I like to keep it simple when it comes to salad dressing so I tend to stick to honey and mustard, I find it also goes with almost any salad. For a single salad I would use 1 tsp of extra virgin olive oil, 1 tsp of balsamic vinegar and mix together in a small ramekin. Add a quarter teaspoon of Dijon mustard and a drizzle of honey. Season with salt and pepper and stir again until combined. Sometimes I even add a teaspoon of humous to make a creamier more indulgent dressing.


Lunch boxes:
If you ever needed an excuse to buy some snazzy Tupperware then surely this is it. I have a bit of an unhealthy obsession with Tupperware but this is my current favourite by Box Appetit, I have two of the same box, one in pink and one in green and I use them all the time. Happy lunching everyone!

Homemade Salad Boxes

If you’ve had a go at making any of my recipes, I’d love to hear from you. Follow me now @corrieheale and tag your recipe pictures using #corriesrabbitfood.


Spicy Thai salad

Spicy Thai Salad
Spicy Thai Salad

Have I mentioned that I once booked a month long trip to Thailand drunk? Well I did. Feeling sick and like I’d swallowed an ash tray, I remember my eyes squinting at about 8 confirmation emails about my trip. Trip? What trip?… Oh dear.
I scroll down one of the emails confused and dizzy, where the hell am I supposed to be going? Thailand it seems. To do what? Work with turtles. Okay, well that doesn’t sound too bad, now what’s that number? Is that a reference number? Oh wait, there’s a symbol in front of it, is that a pound sign?… £2,800… TWO THOUSAND EIGHT HUNDRED POUNDS!!!
After I’d finished being sick, I came to the conclusion that it could have been a lot worse. A ‘turtle’ project, could very easily have been a ‘lion’ project and I’m the kind of person who would totally get mauled by a lion.
So anyway, eight months later, off I went to Thailand to save the turtles. Not sure how many I actually saved, only saw a couple but I did get a very nice tan and ate lots of lovely Thai food. I was lucky enough to have all my meals cooked for me by an elderly Thai woman called Pah Nii. Most days, she’d make me a papaya salad that consisted of shredded unripe papaya, chilli, garlic, peanuts and lime. Finding an unripe papaya in London though was always going to be tricky, so instead, I’ve substituted it for raw courgette, which has a similar texture. It’s not quite as good as Pah-Nii’s, but it’s close. Enjoy!


Spicy Thai salad
Serves 2 / Hands on time 15 mins / Total time 15 mins / V🌶
You’ll need: Pestle and mortar
For the salad
2 medium courgettes, grated (or a large green papaya) 
Handful of green beans, cut into quarters
3 medium tomatoes, chopped
2 tbs dry roasted peanuts
1 lime cut into quarters
For the dressing
1 garlic clove, peeled
½ medium red chilli, seeds in (less if you don’t want it too spicy)
1 tbs dry roasted peanuts
2 tbs lime juice
1 tbs soy sauce
1 tsp light brown sugar


Method
1. Grate the 2 courgettes and put in a large bowl, along with the chopped tomatoes and the green beans. Mix and put to one side.
2. In a pestle and mortar, mash together the chilli and the garlic with a good pinch of salt (no need to pre-chop these, mashing will combine into a paste). Keep mashing and bashing for a few minutes until you have a paste. Add a tbs of peanuts and continue to mash for another minute (it’s okay if the paste is a bit grainy).
3. Add the sugar, a tbs of soy sauce and 2 tbs of lime juice to the paste and continue to mash until incorporated.
4. Roughly chop the dry roasted peanuts and add them to the courgettes and give the salad a stir. Pour over the dressing and stir again until well dressed. Pour onto plates and serve with limes wedges.

Spicy Thai Salad

If you’ve had a go at making any of my recipes, I’d love to hear from you. Follow me now @corrieheale and tag your recipe pictures using #corriesrabbitfood.


V– Vegetarian    🌶– Spicy


Rhubarb breakfast muffins

Rhubarb Breakfast Muffins
Healthy Rhubarb & Apple Muffins

Rhubarb is in season but I always struggle to know what to do with it. Apart from crumble I get a bit stuck. You can’t eat it raw (well you can but it’s very tart) and it doesn’t really lend itself to anything savoury, unless you pickle it – which I don’t have time for. So what else can you do with it?
Well, as you can see, I decided to make muffins but these are no ordinary muffins, these are my attempt at a ‘healthy-ish’ breakfast muffin (basically I’m bored of granola and want to eat cake for breakfast).
This was a bit of a challenge though, in my experience low calorie muffins taste like sweetened dog shit, so how do I make mine taste good with only half the sugar and no butter? To be honest I don’t know. I made this recipe up with a load of things I thought might work and to my astonishment, they actually did.
I like to eat mine in a bowl with yogurt but they’re also good for scoffing on the go – depends how late for work you are.


Rhubarb breakfast muffins
Makes 12 / Hands on time 20 mins / Total time 40 mins + cooling /

You’ll need:
Muffin cases and a 12 cup muffin tin
150g caster sugar
175g rhubarb, diced
2 tbs rapeseed oil
1 egg
130g full-fat Greek yogurt
1 tsp vanilla extract
200g plain flour
50g chopped walnuts
20g pumpkin seeds
¼ tsp sea salt flakes
½ tsp ground ginger
1 tsp baking powder
1 tsp bicarbonate of soda
Topping
Handful of oats
Demerara sugar for sprinkling
Greek yogurt to serve (optional)


Muffin Rules
Rule 1. Don’t over mix. Over mixing will produce tough muffins. 

Rule 2. Be quick! As soon as you combine the wet and dry ingredients, the chemicals in the raising agents will start to rise. Get the muffins in the oven as soon as possible. 


Method
1. Preheat an oven to 190°C/170°C fan/375°F/gas mark 5. Line 12 muffin cases in a muffin tin. In a large mixing bowl, add the sugar and the chopped rhubarb and give it a good stir. Add the egg, oil, vanilla, salt, yogurt and combine well.
2. Stir in the walnuts along with the pumpkin seeds before adding the flour, ginger, baking powder and bicarbonate of soda. Mix quickly until just incorporated and spoon swiftly and evenly into the muffin cases – a heaped tablespoon each should suffice. Sprinkle each muffin with oats and Demerara sugar and bake in the oven for 15-18 mins.
3. Leave to cool on a cooling rack and serve with a dollop of yogurt or enjoy on the go. Store in an airtight container lined with kitchen roll and consume within 4 days. Suitable for home freezing.


If you’ve had a go at making any of my recipes, I’d love to hear from you. Follow me now @corrieheale and tag your recipe pictures using #corriesrabbitfood.


V– Vegetarian   – Suitable for home freezing once baked. Wrap individually in clingfilm and freeze for up to 3 months. Defrost the night before and enjoy for breakfast the next morning.